How to Choose a Conductivity Meter for Water?

Choosing a conductivity meter for water is not just a matter of comparing prices or screen sizes. The right instrument depends on the water you test, the range of readings you expect, and how consistently you need to measure. A meter used for drinking-water checks may have different requirements from one used for aquariums, hydroponics, or laboratory samples. Small details matter.

Check the measurement range and resolution against your actual samples. Conductivity is commonly reported in µS/cm or mS/cm, so make sure the meter’s units are clear and its range fits your work. Temperature also affects readings. Automatic temperature compensation can help, but it does not remove every source of error. Calibration, a clean probe, and careful sampling still matter. Rinse the sensor between samples, and avoid touching its sensing surfaces.

Consider the probe’s design, replacement cost, and availability of calibration solutions before buying. A durable probe can be useful for frequent field checks; a replaceable one may make more sense over years of use. Look for a readable display, straightforward controls, and instructions that explain calibration and maintenance. These features are easy to overlook.

No single model is best for every setting. In practice, even a reliable meter can give misleading readings if it is poorly maintained or used outside its specified range. That part is sometimes missed. This guide explains how to compare key features and choose a conductivity meter for water that suits your samples, workflow, and level of measurement confidence.
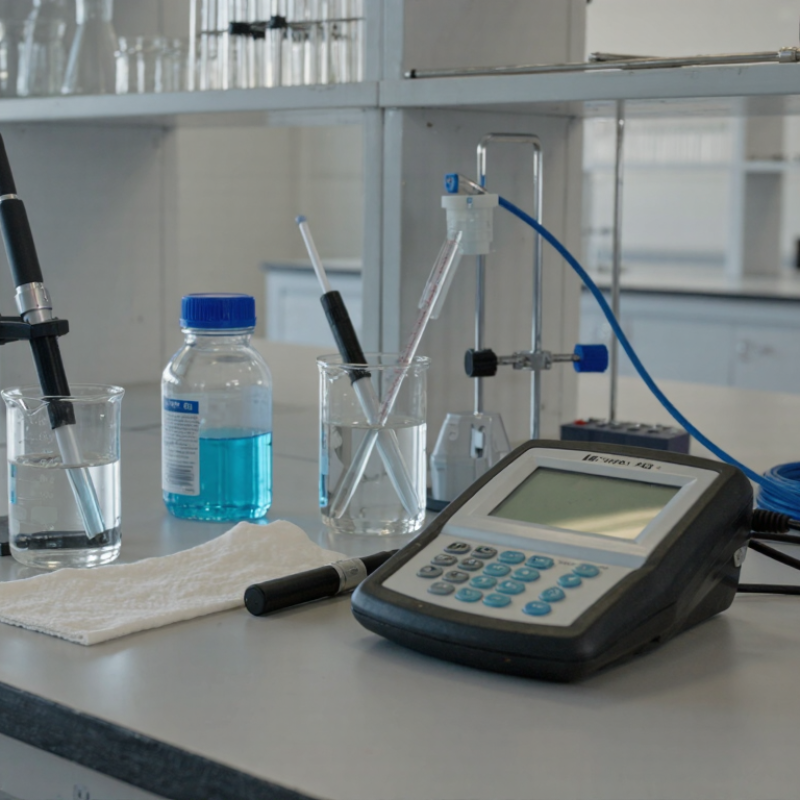
How to Choose a Conductivity Meter for Water?

Identify the Water Type and Estimate Its Conductivity Range

Identify the sample before choosing a meter. Tap water, well water, river water, and seawater can differ sharply in dissolved ions. The USGS Water Science School reports that streams and rivers commonly measure about 50–1,500 µS/cm, though geology and runoff can push readings outside that range. Start with the likely source, then check local water records if available. A river beside limestone may read higher than a stream draining granite. Small details matter.

For seawater, NOAA reports an average ocean salinity near 35 parts per thousand; conductivity is roughly 50,000 µS/cm at 25°C. That is a very different measuring window. Distilled or reverse-osmosis water may need a meter that resolves low readings, while brackish samples need more headroom. Real samples are messier. A clean-looking glass does not reveal its conductivity.

Choose a meter whose range covers the expected value without sacrificing useful resolution. Check whether it displays µS/cm or mS/cm, and whether temperature compensation is available. Conductivity changes with temperature, so compare readings at a stated temperature, commonly 25°C. Rinse the probe between samples and let the reading settle. It sounds simple, but bubbles or residue can skew a result. These ranges are starting estimates, not a substitute for testing the actual water.
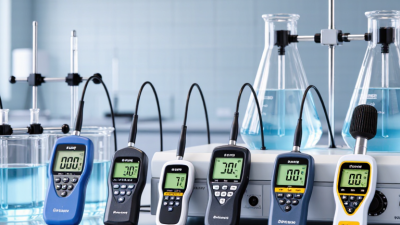
How to Choose a Conductivity Meter for Water? — Identify the Water Type and Estimate Its Conductivity Range

Use the water type as a starting point when selecting a meter, then choose a measurement range that covers the expected conductivity. Values are approximate at 25°C and vary with dissolved minerals, treatment, and temperature. Conductivity alone does not identify water quality.

Match the Meter Range to 84 μS/cm, 1.413 mS/cm, or 12.88 mS/cm Standards

How to Choose a Conductivity Meter for Water?

Match the Meter Range to 84 μS/cm, 1.413 mS/cm, or 12.88 mS/cm Standards

A conductivity meter should cover the standards you plan to use, with suitable resolution around each value. The 84 μS/cm standard checks low-conductivity measurements. The 1.413 mS/cm standard suits many routine checks, while 12.88 mS/cm helps verify readings at higher conductivity. Confirm the meter’s stated range includes all three, and check its accuracy specifications near your expected sample values. A wide range alone does not guarantee useful precision.

Also check that the meter can display the units clearly and accept the calibration points you need. Automatic ranging can be convenient, but it does not replace calibration or careful rinsing. Residue from a previous sample can distort a reading, especially at the lower standard. Temperature compensation matters too; use the meter’s instructions and keep standards near the recommended temperature.

Tips: Rinse the probe with clean water, then gently blot it before each standard. Avoid wiping the sensing surface. Let the reading stabilize, and record the standard value, temperature, and calibration date. One easy detail to overlook is standard condition: an old or contaminated solution can make a capable meter appear inaccurate. Check it before blaming the instrument.

Select a Cell Constant: 0.1, 1.0, or 10 cm⁻¹ for the Sample Range

How to Choose a Conductivity Meter for Water?

Select a Cell Constant: 0.1, 1.0, or 10 cm⁻¹ for the Sample Range

The cell constant determines how the sensor’s conductance becomes conductivity. A 0.1 cm⁻¹ cell suits low-conductivity water, where a 1.0 cm⁻¹ cell may produce a weak signal. A 10 cm⁻¹ cell is better suited to highly conductive samples, such as concentrated process water. These are practical starting points, not universal cutoffs; check the meter’s specified range and electrode design. Small signal, big error. ASTM D1125 describes conductivity measurement and calibration using potassium chloride solutions. Its reference values place 0.01 mol/L KCl near 1,413 µS/cm at 25 °C, a useful mid-range check.

Match the cell to the sample you actually test. For ultrapure or lightly mineralized water, a 0.1 cm⁻¹ cell can improve measurement response. For common freshwater, a 1.0 cm⁻¹ cell is often a sensible choice. For brines or concentrated solutions, consider 10 cm⁻¹ to avoid readings beyond the instrument’s range. Temperature matters: conductivity changes with temperature, so use automatic compensation only when its settings suit the sample. Calibrate with standards that bracket expected readings, and rinse the cell between samples. Not automatically better. It is easy to choose a cell by habit; checking a few representative samples first can prevent a poor match. I would also record temperature and calibration results, since an unexplained drift can look like a change in water quality.

Compare Accuracy and Temperature Compensation at the 25°C Reference

When choosing a conductivity meter, compare its accuracy at the 25°C reference—not just its headline range. ASTM D1125 gives 1,413 µS/cm at 25°C as the conductivity of a 0.01 molal potassium chloride standard. This provides a useful calibration check near common freshwater readings. If a meter specifies ±1% of reading, a 500 µS/cm sample carries an instrument uncertainty of about ±5 µS/cm, before probe and calibration effects. Small difference.

Temperature compensation matters just as much. The USGS National Field Manual’s specific-conductance guidance explains that correction depends on the water’s temperature response; a generic coefficient may not fit every sample. Many natural waters change by roughly 2% per °C, so an uncompensated reading at 20°C can differ substantially from its 25°C equivalent. Automatic compensation measures temperature and applies a correction, but it cannot identify the sample’s exact chemistry. Check whether the meter lets you adjust the coefficient, and confirm the displayed value is normalized to 25°C. A quick comparison with a temperature-matched standard helps reveal drift. I would still record sample temperature: it is easy to overlook, and useful when results later seem inconsistent.

Check Calibration Procedures Against ASTM D1125 for Water Conductivity

How to Choose a Conductivity Meter for Water?

Check Calibration Procedures Against ASTM D1125 for Water Conductivity

A conductivity meter is only useful when its readings can be trusted. Check whether its measurement range suits your water, from low-conductivity purified water to more mineral-rich samples. Then compare its calibration and measurement steps with the applicable method in ASTM D1125. The standard covers methods for measuring water’s electrical conductivity and resistivity; it does not make every meter suitable for every sample.

Look for clear instructions on selecting a conductivity standard near your expected sample range, setting the cell constant, and accounting for temperature. Many results are reported at 25 °C, so confirm how the meter handles temperature compensation. Rinse the probe with clean water, blot it gently, and let the reading stabilize. Small details matter. A few trapped droplets can skew a low-conductivity result.

Ask how the instrument records calibration data and flags a failed check. Compare its procedure with your laboratory’s written method, and verify that the ASTM edition and measurement approach are appropriate for your work. Calibration is not the whole story. Check performance with a standard before use and after demanding samples. In practice, probes foul, standards age, and operators miss steps. A tidy screen does not prove an accurate result; keep records and investigate drift rather than simply recalibrating it away.

How to Choose a Conductivity Meter for Water? - Check Calibration Procedures Against ASTM D1125 for Water Conductivity

Selection or calibration check Practical guidance ASTM D1125 alignment What to record or verify
Expected sample range Choose a meter whose usable range covers the expected minimum and maximum. Typical examples include high-purity water below 1 µS/cm, many freshwater samples around 50–1,500 µS/cm, and saline or process waters in the mS/cm range. The measurement method should suit the conductivity level; select an appropriate cell and measurement range rather than relying on a single range for every water type. Expected range, selected range, units, and whether the reading is within the instrument’s specified operating limits.
Conductivity cell constant Match the cell constant to the sample. Cells around 0.1 cm−1 are commonly used for low-conductivity water; cells around 1.0 cm−1 suit many general water samples; higher constants, such as 10 cm−1, can be suitable for higher-conductivity samples. Use a suitable cell and determine or verify its cell constant with a conductivity standard. A nominal cell constant should not be assumed to be its verified value. Cell identification, nominal and verified cell constant, standard used, and verification date.
Calibration standard selection Use a traceable conductivity standard with a certified value and temperature information. Common aqueous potassium chloride reference solutions have approximate values at 25 °C of 146.9 µS/cm (0.001 mol/L), 1,412 µS/cm (0.01 mol/L), and 12.86 mS/cm (0.1 mol/L). Use a recognized conductivity solution and its stated value at the measurement temperature. The listed values are approximate reference values; use the standard’s certificate or applicable reference table for the actual calibration value. Standard identity, certified conductivity, reference temperature, lot or certificate details, and expiry or preparation date.
Calibration point and range Select a standard near the expected sample conductivity. If samples span a broad range, use suitable calibration points or ranges across that span, following the meter and cell instructions. Calibration should support the range and measurement conditions used for the water samples; avoid extrapolating far beyond the calibration point without method validation. Calibration point(s), displayed and certified values, range, and any adjustment made.
Temperature measurement and compensation Measure and record sample temperature. Automatic temperature compensation can normalize results to a reference temperature such as 25 °C, but its compensation model may not suit every water composition, especially very low-conductivity water. Keep the standard and sample temperature known and controlled or properly accounted for. Temperature compensation does not replace correct temperature measurement or method-appropriate reporting. Sample temperature, reference temperature, compensation setting or coefficient, and whether the reported result is temperature-compensated.
Calibration procedure Rinse the cell as appropriate, avoid transferring rinse water into the standard, immerse the sensing area, remove trapped bubbles, allow the reading to stabilize, and calibrate using the standard’s value at its actual temperature or the instrument’s validated temperature table. Follow the applicable ASTM D1125 method provisions together with the instrument and standard instructions. Control contamination, temperature, cell immersion, and stabilization so the calibration represents the measurement conditions. Procedure or method reference, standard temperature, stabilization status, calibration result, and operator/date.
Post-calibration verification Check the calibrated system with a standard, preferably one appropriate to the sample range. Recheck after cell cleaning, maintenance, a failed check, or a significant change in measurement conditions. Document verification as part of the laboratory’s measurement quality controls. ASTM method alignment does not establish one universal acceptance tolerance for every meter, cell, and application. Measured check value, certified value, difference or percent difference, laboratory-defined acceptance limit, and corrective action if needed.
Resolution, repeatability, and reporting Confirm that display resolution and instrument performance are appropriate for the required reporting level. For low-conductivity samples, use clean equipment and minimize exposure to atmospheric carbon dioxide and contamination. Use consistent measurement and reporting conditions; state the method basis and relevant temperature information so results can be interpreted and reproduced. Result and units, sample temperature, reference temperature if compensated, cell constant, method reference, and relevant quality-control results.

Note: Confirm the applicable edition and detailed requirements of ASTM D1125 for the specific measurement procedure. Calibration tolerances and verification frequency should be established for the instrument, cell, sample range, and laboratory quality system.